Posts

Showing posts from June, 2014

Butterfly Conservatory at Elizabeth’s Secret Garden

Image
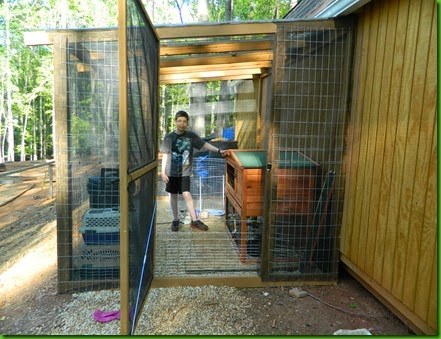
    Judi Sunshine the owner of Wingin’ It Butterfly Farm came for a tour of the official home of Elizabeth’s Secret Garden and to see the butterfly conservatory which is in the construction phase. It will be enclosed with screening and be a safe haven for butterflies. The goal is to breed various butterfly species including Monarchs, Gulf Fritillaries, Black Swallowtails, and more. I’m very grateful to Judi for getting me started off this butterfly season with a selection of butterfly enclosures as well as Monarch eggs. If you are in need of butterfly raising supplies such as microscopes, enclosures, butterfly nets, and more check out her online store. http://www.butterflyfarmingsupplies.com/   I’m getting close to having 100 Milkweeds for the Monarchs. Many of them are small, but they grow fast. Monarch conservation is close to my heart and I do presentations at schools and camps teaching about butterflies. The dream I once had is now really happening. I encourage...

How to Turn Wood Pallets into Compost Bins

Image
  After the construction of our modular home, we were left with several wood pallets. Most people would disregard them and consider them trash, but we looked at them and saw a potential treasure. A treasure because they would save us money. Who would pass that up? When I see those pallets I think of the saying,“A penny saved is a penny earned.” – Benjamin Franklin. And just like that “ka ching” money saved that can be put towards the next project on SHAPE Eco Farm. Here is my sister standing next to our reclaimed wood pallets. You can find wood pallets by approaching a construction site and taking them off there hands. I’m sure they would oblige quickly because that is one last thing they have to haul off to the dump. Assembling these compost bins was a snap. All that is needed is people (most importantly), screws, wood pallets, and a drill. We have  a saying around our house, “If you want to eat, you got to work.” It has worked well for us thus far.     We...

Why Homegrown Vegetables are The Way to Go

Image
  After eating homegrown zucchini and squash from my garden, I’d much rather eat home grown vegetables then that imported grocery store stuff again. Who wants fruits and vegetables from Mexico when you can eat vegetables that have been picked a few hours ago? Just imagine how many days or maybe weeks that produce has been laying around. Not to mention the places it has been, the fossil fuel that has been guzzled up, or the poor pay labors received. I frankly will say that grocery store zucchini is practically tasteless when compared to my produce that has a natural sweetness to it. My family must be getting tire dof me saying, “I just can’t believe how good these vegetables taste!” Fact: According to the Web produce in the U.S. travels, on average, 1300 - 2000 miles from farm to consumer.For tomatoes alone it is about 1,369 miles. That to me is preposterous. I’d rather walk a few yards to get fresh vegetables. Now wonder the modern vegetable is almost lifeless by the time it re...

How to Build a Rabbitry

Image
    SHAPE Eco Farm was in need for a safe and secure habit for our pet and meat rabbits. Our rabbitry ended up becoming more like a bunny palace than a rabbit habitat. I now understand how easy it is to spoil pets and give them a luxurious life style. I write this blog entry with the goal of showing how our rabbitry was made and giving you some how to instructions. This entry is for the rabbit enthusiasts and anyone who enjoys DIY projects. Here is a list of the materials we used: Suntuf 26” x 8’ Solar Gray Poly Panels from Lowes Six 8-foot 2 x 4 pressure treated wood Four 10-foot 2 x 4 pressure treated wood Five 8-foot 2 x 4 pressure treated wood Two 10 foot 4 x 4 pressure treated posts Six skew joist hangers 3 inch deck screws One hundred screws with neoprene washers Galvanized rabbit wire fencing 48” x 50’ Pea gravel Dig a hole at least 3 feet deep for the 4x4 posts. Place about 2 inches of gravel in the hole (pea gravel works well). Bury the post in the hole and en...